Managing Users and Invitations
Last updated: September 18, 2026
Manage who has access to your Pursuit workspace, send invitations, and monitor team activity.
User Roles
See 📄 User Roles and Permissions to understand the different roles and permission scope.
Inviting New Users
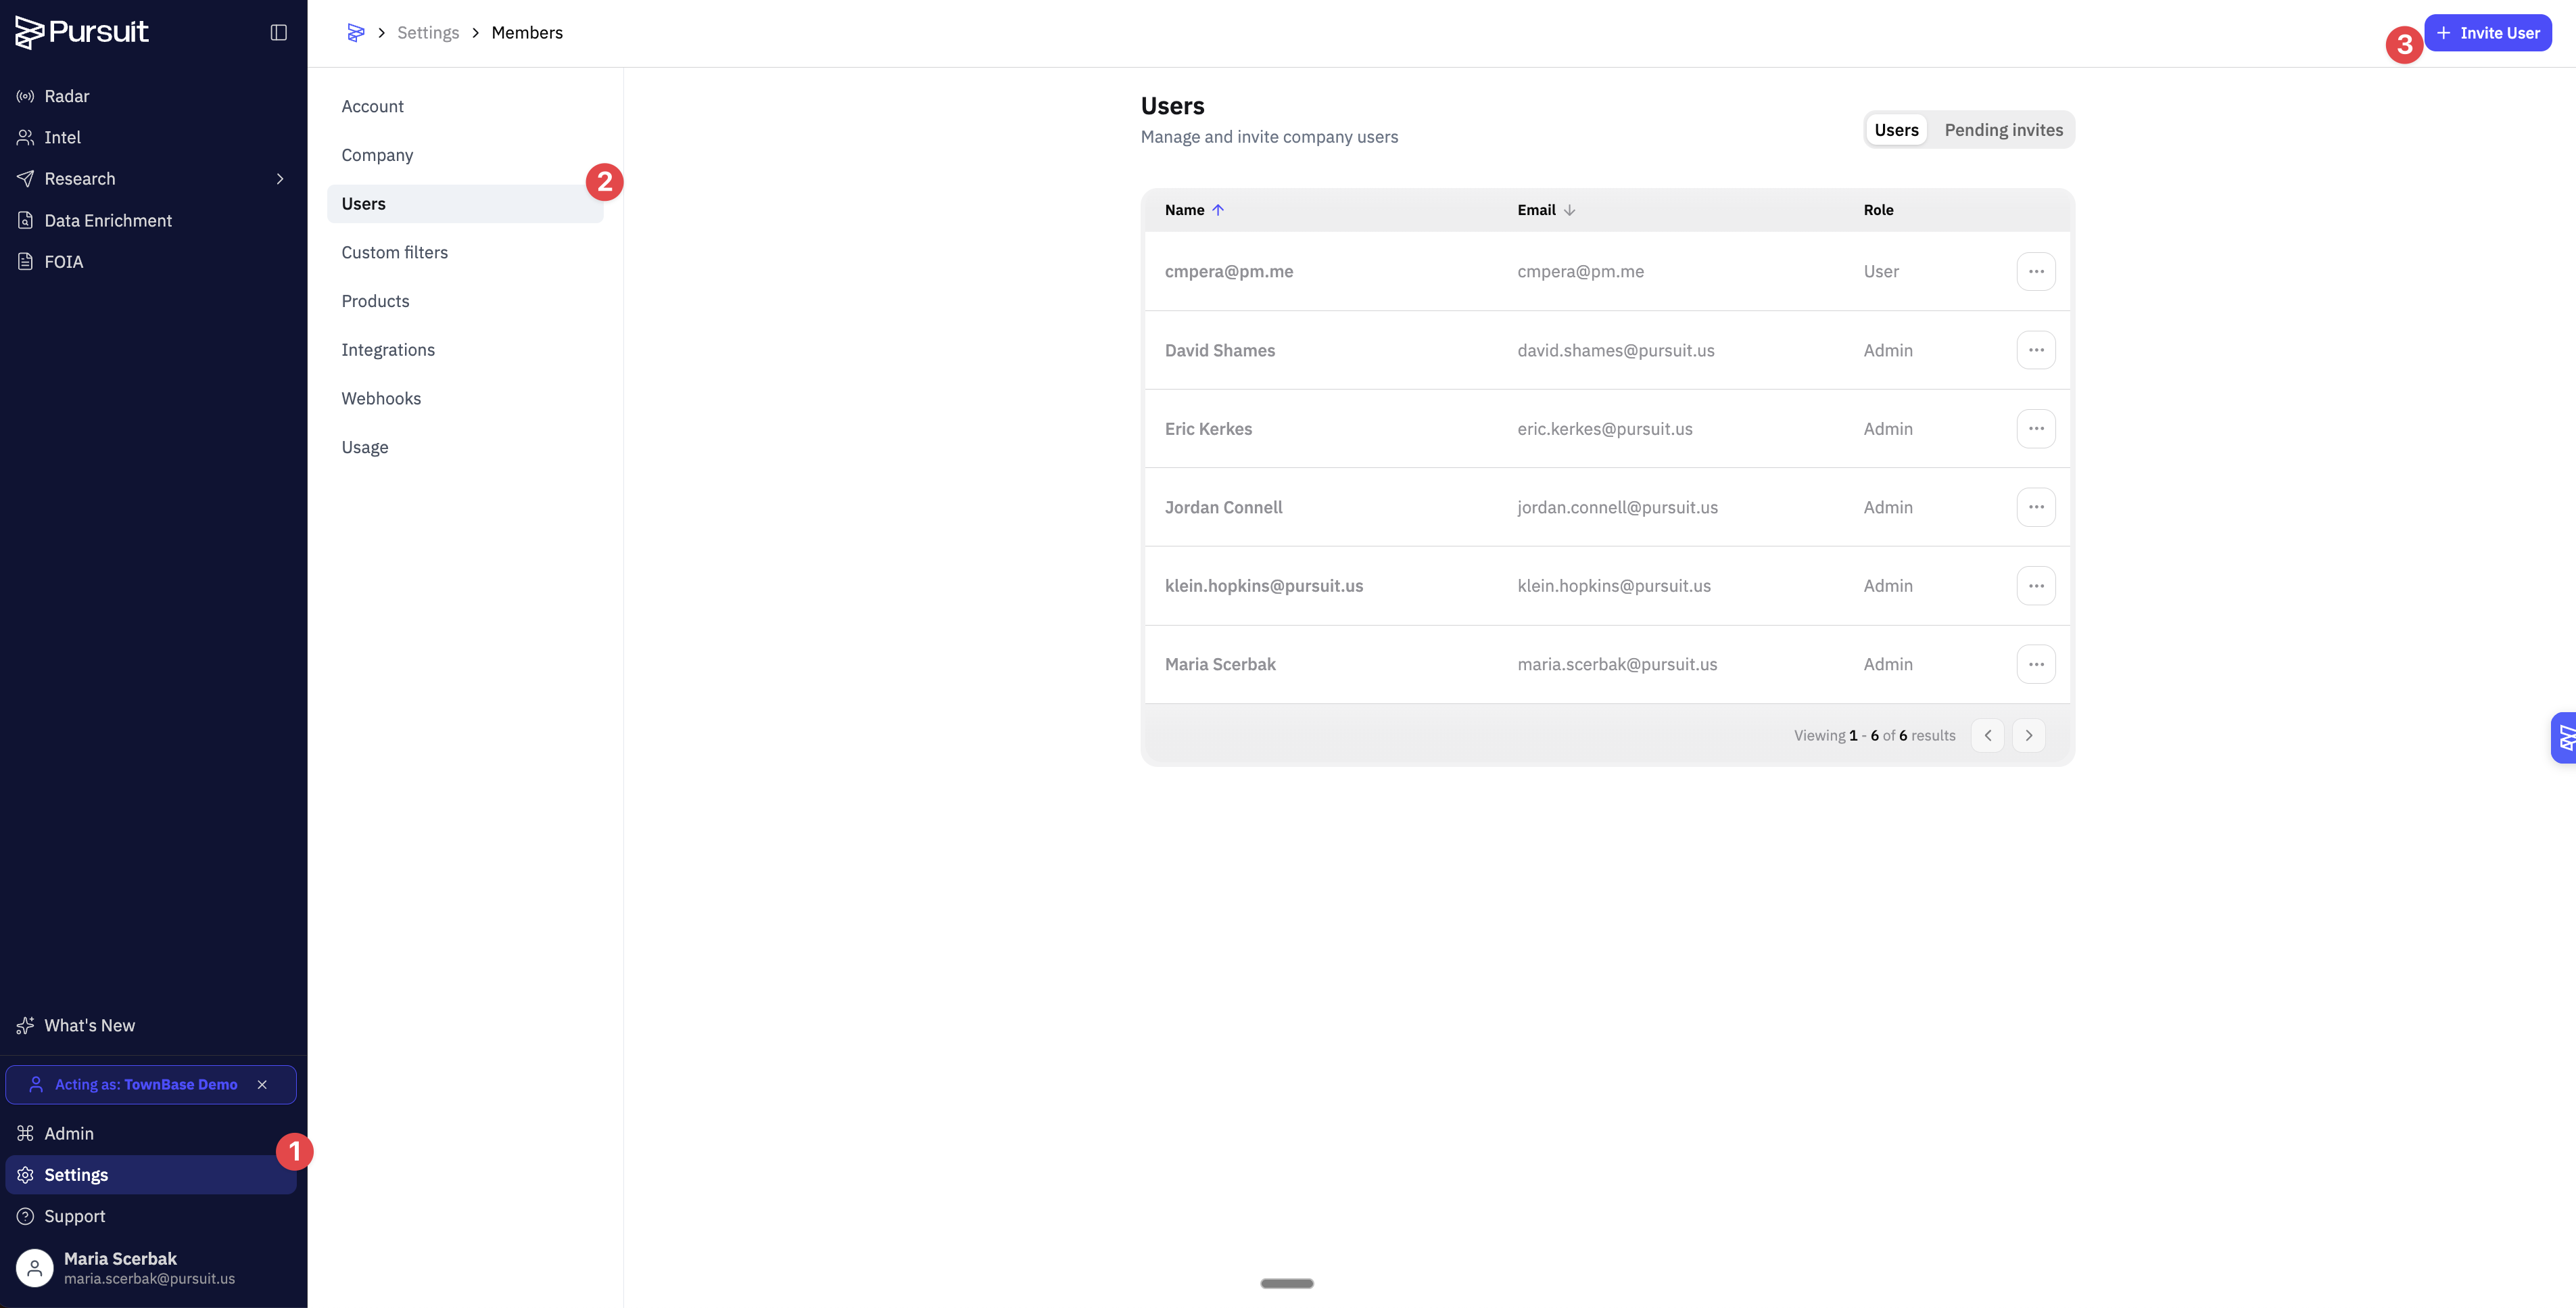
Go to Settings → Users.
Click Send Invite.
Enter the new user's email address.
They'll receive an email with a link to join.
See 📄 Setting Up Single Sign-On (SSO)if your organization uses SSO.
Inviting teammates with Pursuit Agent
If you are a company Admin, you can send invitations without opening Settings.
Connect Pursuit to your AI assistant if you have not already. See Using Pursuit with AI Assistants (MCP Integration)
Ask for the invitation, including the access level: "Invite alex@company.com as a User."
Confirm when Pursuit Agent shows you the email address and access level. The invitation sends after you approve it.
The invitation and the access levels are the same ones you get from Settings: User or Admin. Only company Admins can invite teammates.
Onboarding New Team Members
The most important first step for a new user is setting up their Radar profile — selecting products and territory.
This ensures consistent setup and makes your team even more effective from day one. See 📄 Your Personalized Feed (Inbox)for what to configure.
Recommended approach for admins:
Pre-configure Radar profiles before your team logs in!
Go to Settings → Users
Click the
⋯menu next to a user,Select Edit Radar Profile.