Account Research and Opportunity Scoring
Last updated: July 31, 2026
When to Use This
In Research Mode, Score Entities (Account Scoring) is an AI-generated capability that ranks and prioritizes the entities in your workbook based on the research and data you've collected. Each entity receives a single score from 0 to 100, where 100 is your highest-priority target and 0 is the lowest.
The score is a weighted roll-up: Pursuit evaluates each factor you include, then combines those factors according to the weights you set. Because every score is backed by a per-factor breakdown (see Reviewing Your Results), you can always see why an entity landed where it did — not just the number.
Adding an Account Score Column
To set up account scoring:
Click Add AI Column in the workbook toolbar.
From the menu, select Score Entities.
This opens the scoring configuration panel.
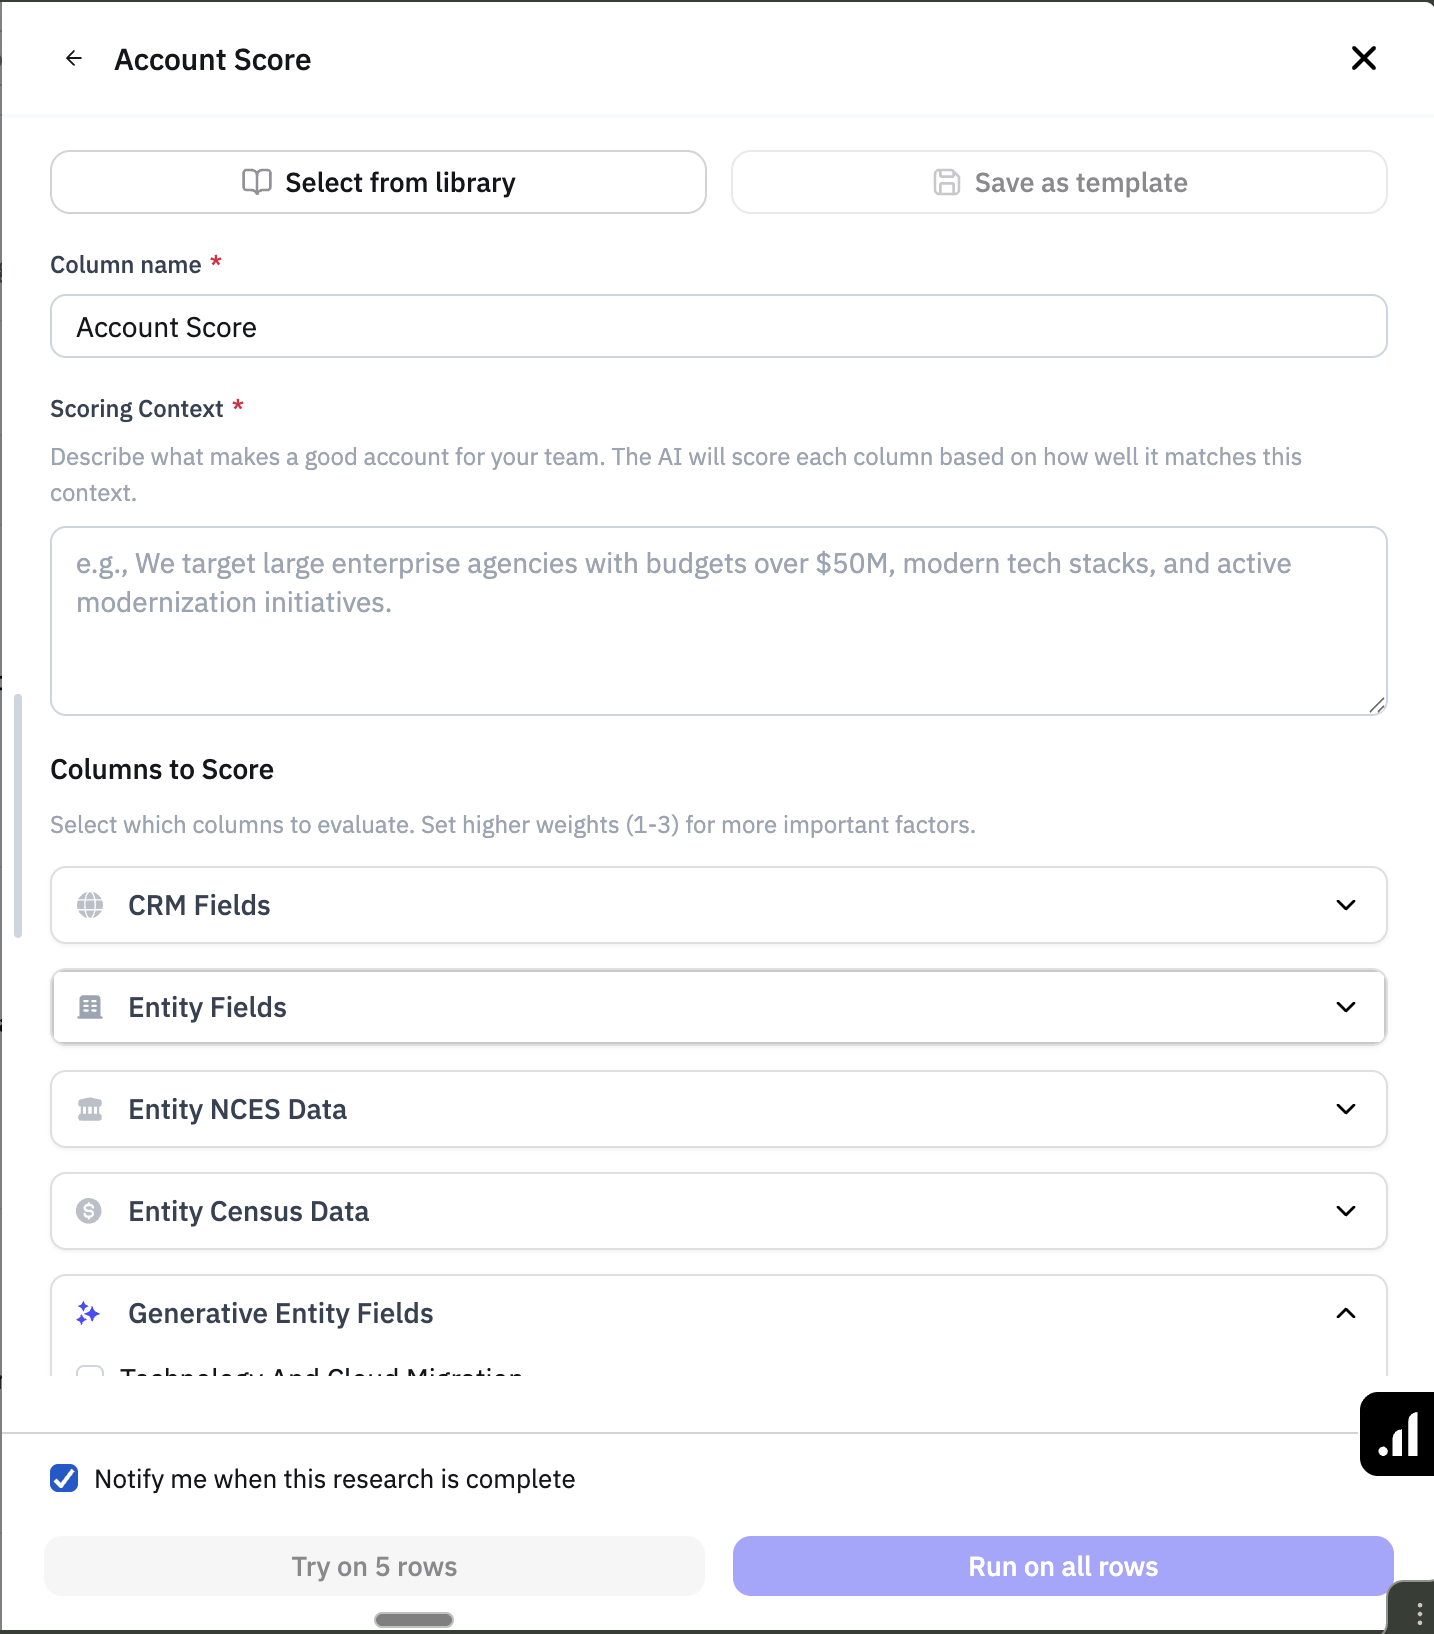
Configuring the Scoring Model
Step 1: Name Your Column
At the top of the configuration panel, you can change the column name to something descriptive. For example, "Q1 Priority Score" or "Territory Fit Score."
Step 2: Select Fields to Include
Choose which fields you want to factor into your scoring model. You can select from:
CRM Fields: Fields and filters you pass directly from your CRM to Pursuit.
For example, in your CRM you may have account fields like industry, ICP fit, etc. that you want to include in your scoring model.
Note: these can easily be added by your Pursuit admin on the Integrations page
Pursuit provided demographic and firmographic data: Fields like population, location, or entity type from NCES or Census
Generative Entity Fields: the AI research prompts you've already added to your workbook. These are the richest scoring inputs because each one already returns a structured result (a 1-5 sub-score, a confidence level, and a short rationale) that the scoring model can weigh directly.
Select whichever combination of fields is most relevant to how you want to evaluate and rank your entities.
Tip: You should have all fields already added and populated to your workbook before you run your Account Scoring model.
You can always go back and re-run the Score Entities function if you decide to change the inputs.
Step 3: Assign Weights
For each field you've selected, assign a weight that sets how much it moves the overall score:
High — a primary driver; this factor should strongly shape the ranking.
Medium — a supporting factor; it matters, but shouldn't outweigh your primary drivers.
Low — relevant but less influential
Reserve High for the one or two factors that truly define a good-fit account. If everything is High, nothing is prioritized. A clean split of a few High factors and several Medium factors produces the most useful ranking.
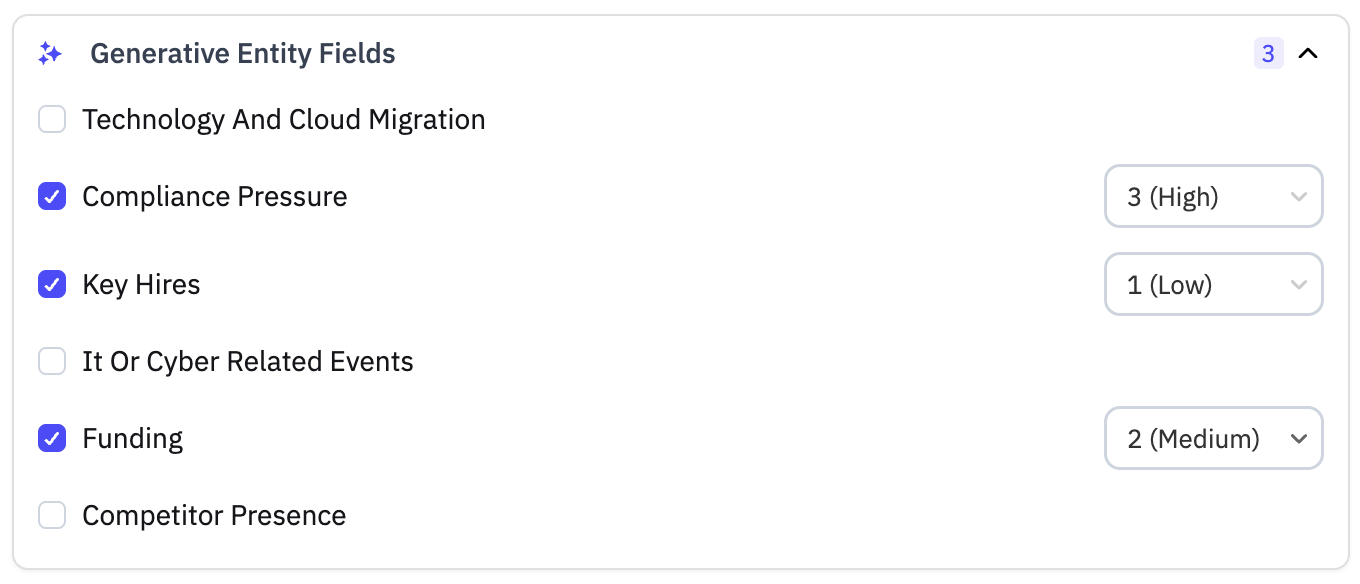
Set each weight according to how important that factor is to your prioritization criteria.
Step 4: Write Scoring Context
In the Scoring Context section, you'll provide written guidance that tells the model exactly how to evaluate each field you've included.
Write context for every factor you weight as High. The model follows your definition of "good" literally, so the more precisely you describe what a strong signal looks like, the more your scores will match the calls you'd make yourself.
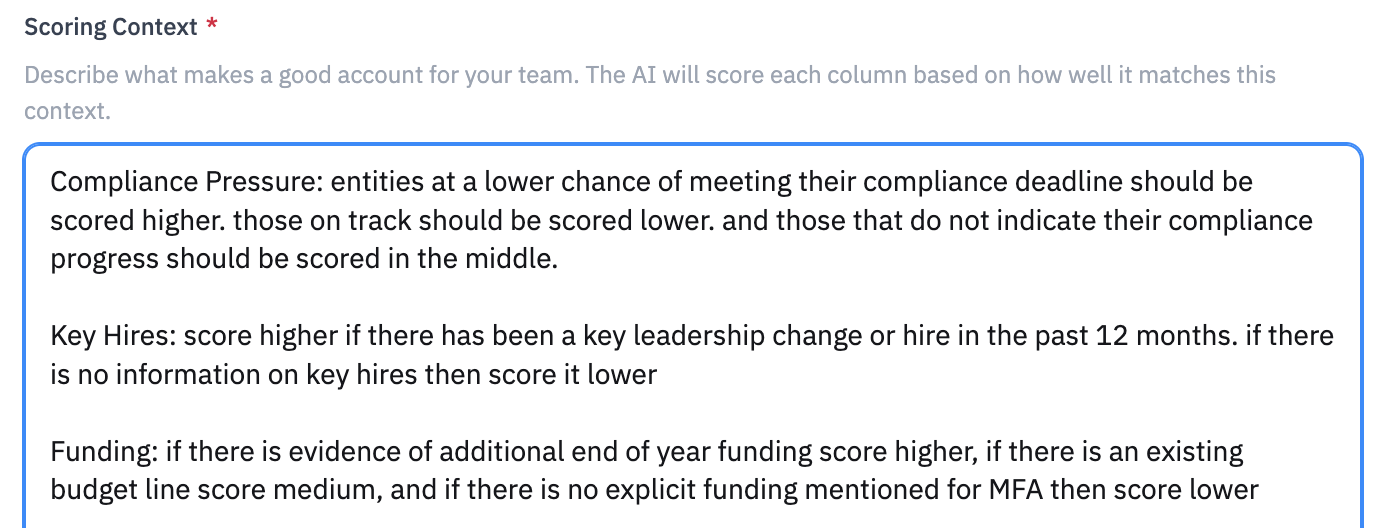
For example, if you've included "Technology and Cloud Migrations" and rated it as high importance, you might write context like: "Organizations that show an active indication of moving to the cloud should score higher than those that don't have that indication."
Tip: Write scoring context for each field to ensure the model evaluates entities the way you would.
Running Your Account Score
Start with a Test Run
Before running the score across your entire workbook, it's always recommended to try it on the first 5 entities first. This lets you validate that the scoring results match the format and quality you expect before committing to a full run.
Enable Notifications
Toggle on Notify me when this research is complete to receive an email when scoring finishes. This is especially useful for larger workbooks where processing may take some time.
Important: Wait for Research to Complete
Make sure all of your research prompt columns have finished running before you apply the account score. The scoring model relies on the outputs of those research prompts, so incomplete data will produce incomplete scores.
Reviewing Your Results
Once scoring is complete, you'll see a score applied to every entity in your workbook.
Viewing a Score
Once scoring is complete, every entity in your workbook has a score. Click into any entity's score to see two views:
Content — the numeric score, 0 to 100.
Sources — the full breakdown of how that entity earned its score, factor by factor.
Reading the Sources breakdown. For each factor you included, the breakdown on each AI column source shows three things:
Sub-score — how that single factor scored, on a 1-5 scale where 5 is strongest for you. These sub-scores, combined with your weights, produce the 0-100 total.
Confidence (High / Medium / Low) — how much supporting evidence Pursuit found. Confidence tells you how much to trust a factor's sub-score; it does not raise or lower the score itself. A high sub-score with Low confidence is a lead worth a human look.
Rationale — a short plain-language explanation of why that factor scored the way it did, citing what Pursuit found.
Use the breakdown to sanity-check a ranking: if a top-scored account is riding on one Low-confidence factor, verify it before acting; if a promising account scored low, the rationale usually shows which factor pulled it down.
Interpreting a Score
A few rules govern how factors are scored, so your rankings behave predictably:
"Nothing found" is a real signal, not a blank. For factors that look for a specific signal (a mandate, a funding event, a compelling trigger), finding nothing means that entity scores lowest on that factor — absence counts against priority, it doesn't get skipped.
"Not enough information" is different from "not a fit." For open-ended assessment factors, if Pursuit genuinely can't find enough to judge, that factor is marked N/A and sits out of the calculation rather than dragging the score down unfairly. The rationale will say so.
Recency matters. Scoring weights recent evidence (roughly the last 18 months) so a stale signal doesn't inflate a score. Durable facts — active contract terms, end-of-life dates, accreditation cycles, multi-year strategic plans — are honored regardless of age.
Public records come first. Pursuit prioritizes primary public-sector sources (public records, FOIA'd and OCR'd documents) over secondary mentions, so scores lean on verifiable evidence.
Tips for Effective Scoring
Keeping your account scores updated and relevant
You can schedule your research prompts as well as your Account Scoring AI function to regularly update your score assignments.
Ensure your research prompts are run on a schedule that makes sense (e.g. weekly updates to an Annual Budget field is likely too often).
Make sure your input fields are scheduled to update before your scheduled update to the Account Score so it includes all of the latest data.
Other tips
Be specific in your scoring context — the more precise your guidance, the more accurate the results
Check confidence, not just the score — a high score built on Low-confidence factors deserves a human look before you act on it.