Matching Contacts Between Your CRM and Pursuit
Last updated: October 9, 2026
Using Data Enrichment, Pursuit can enrich your existing contacts by matching your data to Pursuit's database. The enriched data will include a unique Pursuit ID and a Confidence Score for each matched contact, along with additional data fields (see 📄 Contact Fields Referencefor the full list).
Once processed, the enriched dataset will be delivered via email and made available to use in the Pursuit app (allowing you to filter Pursuit records) and to import into your CRM.
Contact Enrichment syncs Pursuit's real-time public sector contact data directly into your CRM during implementation. This helps to ensure your sellers aren't wasting time on outdated contact information.
When to enrich contact data
Contact data should be enriched as part of your company's initial implementation of Pursuit. Customers can choose to autosync data to ensure accurate confidence scores. Continued use and engagement with the platform and Pursuit communications with inform you of further enrichment opportunities.
See 📄 Contact Enrichment for more information on enriching your contact data with Pursuit
Should I use a CSV or match directly from my CRM?
If your CRM is connected to Pursuit, match contacts directly from the integration. You skip the CSV export, and Pursuit writes the Pursuit ID back to each matched contact for you. See How to Match CRM Contacts with Pursuit.
Use the CSV method below if your CRM isn't connected, or if you need to match contacts whose accounts don't have a Pursuit ID yet.
Prerequisites
Your CRM is successfully integrated to Pursuit
You have already completed the account matching steps to sync accounts between your CRM and Pursuit (see📄 Account Enrichment)
Preparing your contact file
Export the list of contacts from your CRM for the matched accounts
Important: this means only accounts with Pursuit IDs assigned in your CRM
Prepare your CRM export with either the Pursuit Account ID OR the account name and account state that the contact is associated with
I have a Pursuit Account ID that I can add to my contact export
Ensure your CSV export includes (at minimum) the following information:
First Name
Last Name
Title
Pursuit Account ID (this is the account-level Pursuit ID)
CRM ID (the ID assigned by your CRM to the contact)
I have the Pursuit Account ID that I can add to my contact export
Ensure your CSV export includes (at minimum) the following information:
First Name
Last Name
Title
Pursuit Account ID (this is the account-level Pursuit ID)
CRM ID (the ID assigned by your CRM to the contact)
I cannot add the Pursuit Account ID to my contact export
Ensure your CSV export includes (at minimum) the following information:
First Name
Last Name
Title
Account Name (the account where the contact is associated)
Account State (this is the state abbreviation where the contact is associated)
CRM ID (the ID assigned by your CRM to the contact)
Additional contact fields (e.g. email address) can be included in the export to help increase the match rates.
Uploading your contact file
Navigate to the Data Enrichment tab
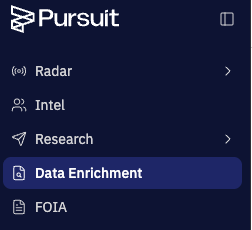
Click on New Data Enrichment in the top right-hand corner
Select Contact Matching
Select My file has a Pursuit ID column
Drag and drop your CSV file onto file upload area
Pursuit will now use the uploaded fields to match and enrich the contact list you just uploaded
Enriching your CRM contact data and connecting contacts
You can check on the status of the data enrichment by clicking back on Data Enrichment in the lefthand navigation bar.
You'll know it's ready once you see a new file entry with your enriched data.
To finish matching contacts between Pursuit and your CRM:
Click on the 3 dots to the right of your enriched contact data file
Click on Download Results to receive an email with your enriched contact data
Matched contacts will have a Pursuit ID assigned to them as well as additional metadata from Pursuit
Refer to 📄 Introduction to Data Enrichment for more information on match scores and how to use them
Review the matched results in the CSV file emailed to you
prioritize uploading those with match scores of
5,4and evaluate those with3
Use the provided match score and confidence score for each account to review both your matched and non-matched contacts to assist with your data cleanup
Upload a CSV of your mapped contacts back into your CRM
Use the CRM ID to upload and map back to your existing contacts in your CRM
The uploaded file will include both enriched contact information as well as the Pursuit ID for each contact. Ensure that this information (at least the Pursuit ID) is marked to be written to your CRM records.